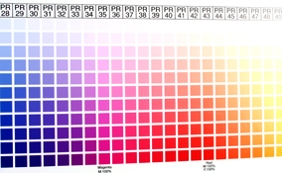
Color
While we can work with files in both RGB and CMYK colors modes, we do prefer to work with CMYK colors whenever possible.
If you require PMS color matching, you must tell your account representative the PMS colors that are critical and include a hard copy proof to match to.
When color is critical , please do no embed images or flatten the layers. Instead, leave the layers intact and link to any images.
Maintain the same color mode throughout your work space (i.e. do not set up your document in CMYK color and then link or embed images that are in RGB colors if possible). Mixing color modes in the same document can produce unexpected results.
Size and Resolution
Setup your document in proportion to your final output size and desired resolution at FINAL size.
Vector Files: Because vector files are based on lines, rather than pixels like raster-based files, they are scalable without losing resolution. Therefore, the artwork will not become pixilated and jagged when it's enlarged, so the most critical element with vector files is that they are setup proportionately to the final output size. We highly recommend using vector-based artwork and text on larger graphics whenever possible for optimum results and easier file management. If raster-based photos or images are to be used within the vector artwork, please refer to the raster file guidelines below.
Raster Files: For banners and signs designed to be viewed at less than 24", your resolution should be 300 dpi at final size. For designs that are to be viewed beyond 24", we recommend a resolution of 150 dpi at final size. For very large banners, signs, and displays that are going to be viewed from a distance, 100 dpi resolution is perfectly fine and will make it easier to work with the files.
Scaling: When scaling your raster-based files, keep in mind each time we need to double the size of your artwork, the resolution drops by half. So if you provide us with artwork that is 1'H x 2'W at 600 dpi resolution at 1/4 scale, the artwork will be 4'H x 8'W at 150 dpi when we enlarge the file to the final size. Keep this in mind when creating your original artwork, as this is critical to getting the best print possible. We do recommend creating your artwork at 1/4 - 1/2 scale for most applications. We do not recommend designing your artwork at less than 1/12 scale.
Compression: Do not compress the files or use any type of compressed format, such as JPEG, unless that's the only option you have for your original images.
Finishing
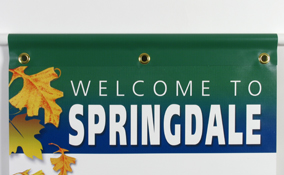
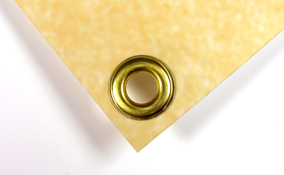
Grommets: If we are finishing your banner or sign with grommets, these will be placed approximately 1.5" on center from the corners and sides as needed. The diameter of the grommets will be between 1/2" and 3/4" in size. Please keep their placement in mind when designing your artwork, so that they will not interfere with any important text or graphics.
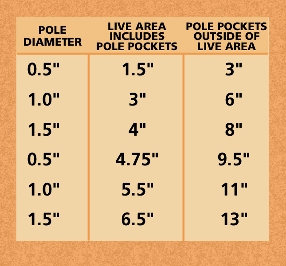
Pole Pockets: When ordering and setting up your artwork for banners with pole pockets, please keep the following points in mind. Be sure to specify the actual size you want the banner to be, the diameter of the pole being used, and whether or not the live area is inclusive of the pole pocket (i.e. the pole pocket area will have part of your live image/text) or if the pole pocket is exclusive of the pole pocket (i.e. the pole pocket is outside of the "live" area where your important text and images will fall). Please refer to the chart below to see how much additional bleed/material you will need for the desired size pole pocket.
If you have any questions regarding banner pole pockets, please contact one our account specialists for immediate assistance.